 Save
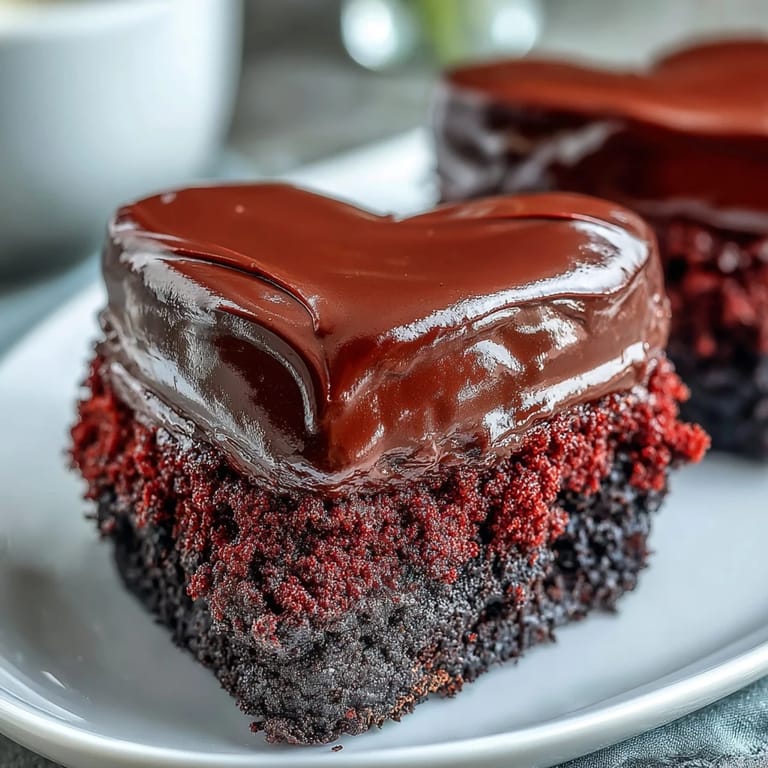
Save The first time I attempted a red velvet cake, I accidentally used liquid food coloring and ended up with a rusty pink disaster that my sister politely called "salmon." Years later, armed with gel coloring and heart pans, I finally got that electric red that makes people do a double-take at dessert time. The Betty Boop silhouette happened on a whim when I wanted something retro and playful for my niece's birthday. Now it's the cake my friends request for every occasion that calls for a little drama and a lot of charm.
Last Valentines Day, I made three of these cakes back to back for different gatherings, and by the third one, my kitchen looked like a crime scene with red splatter everywhere. My roommate walked in, took one look at the chocolate hearts setting on parchment, and asked if I'd started a bakery in her absence. The best moment was watching my 6-year-old nephew face when I served it—his eyes got huge, and he whispered, "It's Betty Boop cake" like he'd met a celebrity.
Ingredients
- Cake flour: Sift it twice for that tender crumb that practically melts
- Natural cocoa powder: Just enough to deepen the flavor without turning the batter brown
- Unsalted butter: Room temperature is non-negotiable for proper creaming
- Red gel food coloring: Gel gives you that saturated cartoon red without thinning your batter
- Buttermilk: The secret ingredient for tender red velvet and its signature tang
- Cream cheese: Also room temperature or you'll end up with lumpy frosting
- Dark chocolate or candy melts: Tempered chocolate holds the silhouette shape beautifully
Tired of Takeout? 🥡
Get 10 meals you can make faster than delivery arrives. Seriously.
One email. No spam. Unsubscribe anytime.
Instructions
- Get your oven ready:
- Preheat to 350°F and grease two 9-inch heart pans like your life depends on it, lining the bottoms with parchment.
- Whisk your dry ingredients:
- Combine cake flour, cocoa powder, baking powder, baking soda, and salt in a medium bowl.
- Cream the butter and sugar:
- Beat butter for 1 minute until creamy, then gradually add sugar and cream for 2 to 3 minutes until fluffy.
- Add the eggs:
- Drop them in one at a time, beating just until blended after each addition.
- Make it red:
- Stir in that gel food coloring, vanilla extract, and white vinegar until the batter looks like something Betty Boop would approve of.
- Alternate wet and dry:
- Mix in one-third of dry ingredients, half the buttermilk, repeat, and finish with the last third of dry ingredients.
- The fizz moment:
- Combine vinegar with baking soda, watch it foam like a mini science experiment, then gently fold it in.
- Bake the layers:
- Divide batter evenly between pans, smooth the tops, and bake for 25 to 30 minutes until a toothpick comes out clean.
- Cool completely:
- Let cakes rest in pans for 10 minutes, then invert onto racks and cool entirely before frosting.
- Make the frosting:
- Beat cream cheese and butter until smooth, then gradually add powdered sugar, salt, and vanilla until fluffy.
- Assemble the cake:
- Frost between layers, apply a crumb coat, chill for 10 minutes, then add a final smooth layer of frosting.
- Create the silhouette:
- Place your stencil under parchment, trace with melted chocolate, and let set completely before carefully transferring to the cake.
 Save
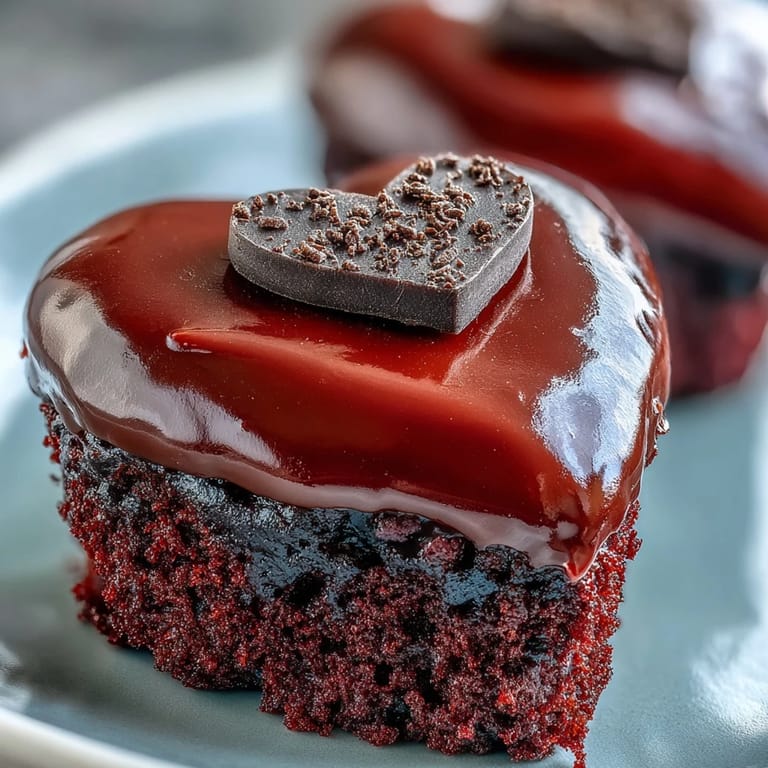
Save The first Betty Boop silhouette I made cracked right down the middle during transfer, and I ended up with a two-headed cartoon character on my cake. My friends pretended it was intentional and called it "artistic interpretation." Now I make extras and keep them in the fridge until the absolute last second, just in case.
Making The Silhouette Work
Print your Betty Boop stencil at the exact size you want, then tape it to your counter with parchment paper over top. The chocolate needs to be completely set but still slightly flexible when you peel it off—like a fruit leather that still gives a little. Work quickly when transferring, because body heat makes chocolate soft and sad.
Getting That Red Right
Gel coloring is concentrated, so start with less than you think and add more gradually. I once went overboard and created a red so vibrant it looked radioactive under restaurant lighting. The perfect shade is somewhere between romance novel cover and cartoon heart, bright enough to wow but not so neon that it hurts your eyes.
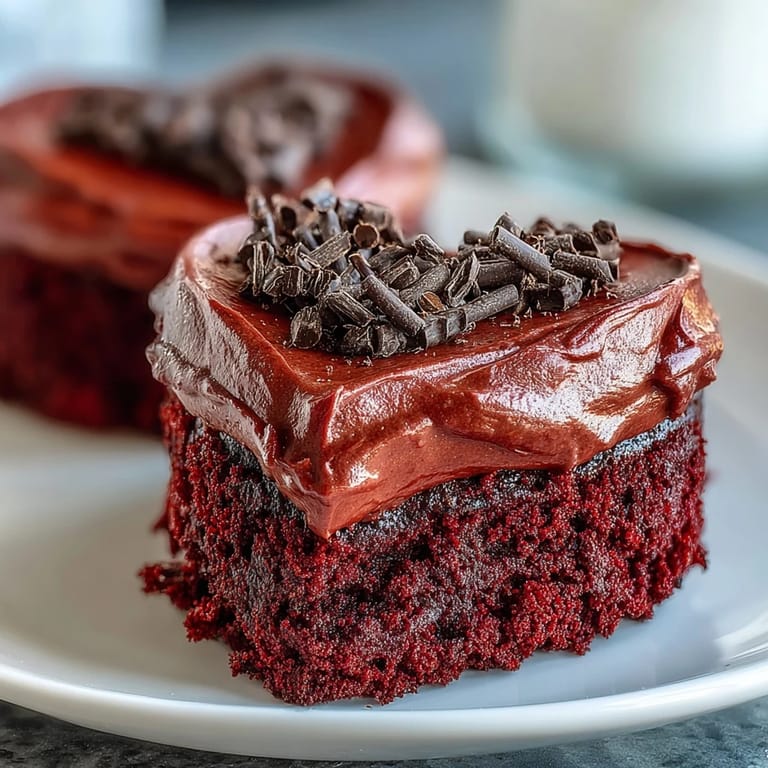
Frosting Like A Pro
Run your offset spatula under hot water, dry it thoroughly, then smooth the frosting while the metal is still warm. The heat melts the cream cheese frosting just enough to create those glassy professional swirls. For extra drama, chill the cake for 30 minutes before serving so the frosting sets firm and each slice holds its shape.
- Freeze your cake layers for 30 minutes before frosting for fewer crumbs
- Use a rotating cake stand if you have one for smoother edges
- Always slice with a warm knife dipped in hot water between cuts
 Save
Save There's something undeniably charming about a cake that looks like it walked straight out of a 1930s cartoon, and watching people realize that crisp dark chocolate is actually edible never gets old.
Recipe FAQ
- → What makes red velvet different from regular chocolate cake?
Red velvet uses cocoa powder rather than melted chocolate, creating a subtle cocoa flavor. The buttermilk and vinegar combination produces a tender, fine crumb and a slight tang that complements the cream cheese frosting.
- → Can I make the Betty Boop silhouette ahead of time?
Yes, prepare the chocolate silhouette up to a week in advance. Store it flat between parchment paper in an airtight container at room temperature, away from direct sunlight and heat sources.
- → Why is gel food coloring recommended over liquid?
Gel coloring provides concentrated pigment without adding extra liquid to the batter. Liquid coloring can throw off the carefully balanced wet-to-dry ingredient ratio, potentially affecting the cake's texture and rise.
- → How should I store the finished heart cake?
Keep the cake refrigerated due to the cream cheese frosting. Cover it loosely with a cake dome or plastic wrap to prevent the frosting from absorbing other flavors. Bring to room temperature 30 minutes before serving for the best texture.
- → Can I use round cake pans instead of heart-shaped?
Absolutely. Two 9-inch round pans will work with the same baking time. The Betty Boop silhouette remains charming on a round canvas. You could also cut the baked rounds into heart shapes if desired.
- → What's the purpose of the vinegar and baking soda step?
Combining vinegar and baking soda creates an immediate chemical reaction that releases carbon dioxide bubbles. This gives the red velvet batter extra lift and contributes to the cake's characteristically tender, moist crumb structure.